
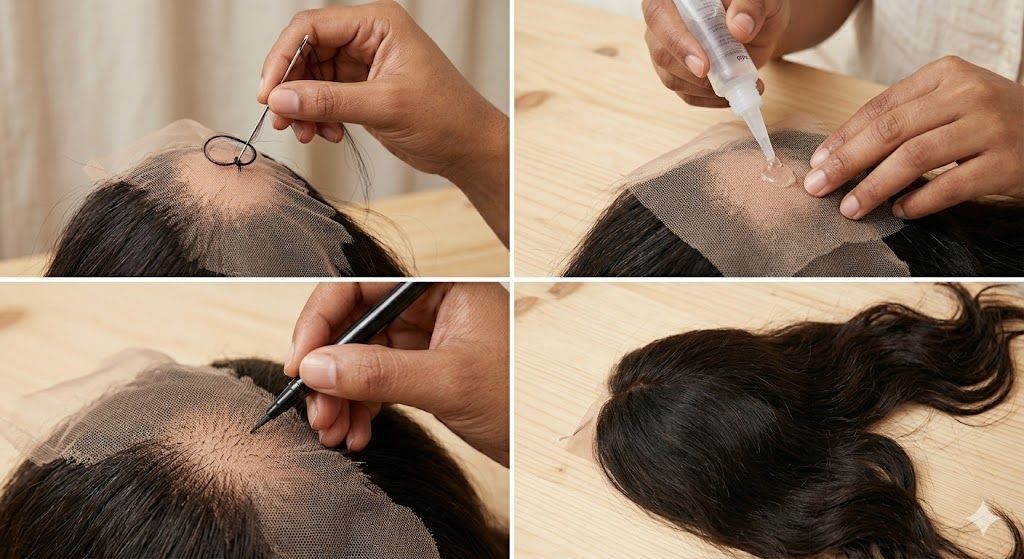
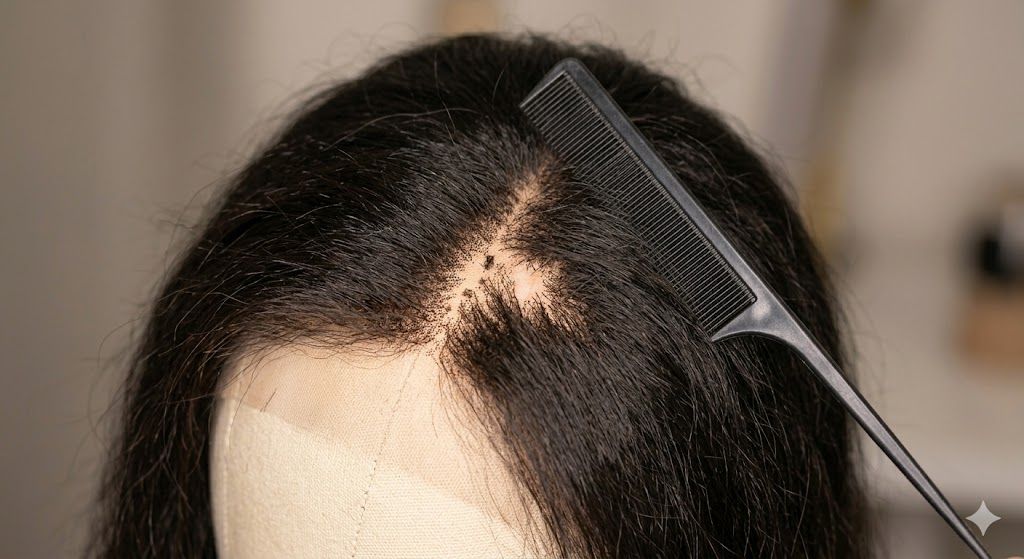
There is a specific kind of heartbreak that happens when you’re prepping your favorite wig and notice a small, thinning patch right at the part. Or worse, a snag that has turned into a visible tear in the mesh. Because high-quality lace closure wigs aren’t exactly cheap, your first instinct might be to panic. But before you look for a replacement, you should know that most lace damage is actually reversible.
Repairing lace closures is a bit like surgery for your hairpieces. It requires a steady hand and a little bit of "hair logic," but it’s a skill that will save you hundreds of dollars. Whether you’re dealing with a standard unit or the ultra-delicate material of hd closure wigs, here is how you can breathe new life into a balding or torn closure.
Why Is My Lace Balding?
Understanding why your closure is failing is the first step in preventing it from happening again. Lace is a foundation, and like any fabric, it has a breaking point.
Most issues with lace closure wigs stem from:
- The "Scratch" Factor: If your scalp itches under the wig and you scratch through the lace, you are effectively mechanical-pulling knots out of the mesh.
- Product Corrosion: Using heavy-duty glues or alcohol-based removers without proper cleaning can make the lace brittle.
- Over-Bleaching: We all love a "scalp-like" look, but over-processing the knots with bleach eats away at the structural integrity of the hair and the lace itself.
- Aggressive Combing: Using a fine-tooth comb on wet lace is a recipe for disaster.
Step-by-Step: Fixing a Tear in the Lace
If you’ve accidentally ripped your lace, don't throw it away. As long as the hair around it is still healthy, the base can be patched.
1. The Clean Slate
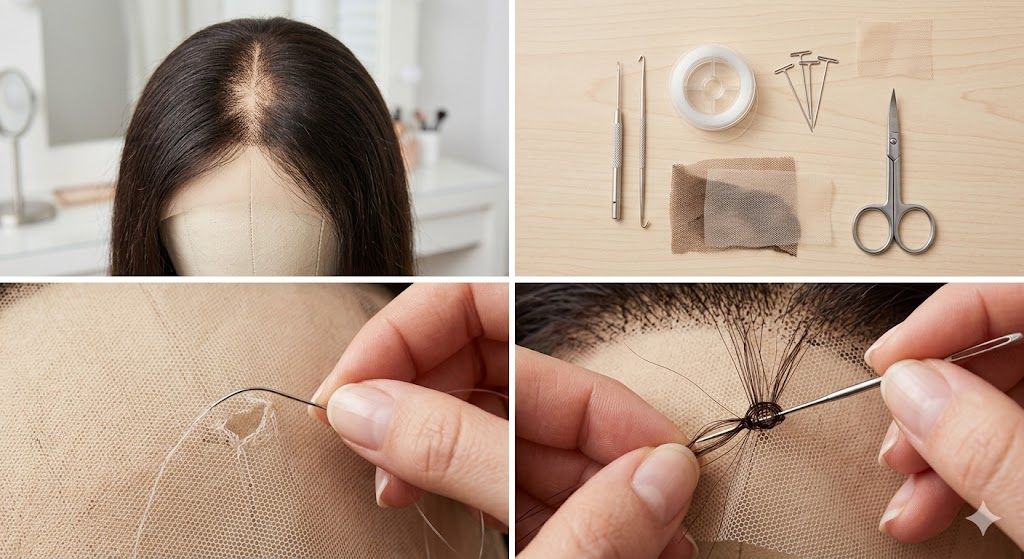
Start by washing the unit. Any residual glue or oils will prevent your repair from holding. Once dry, pin the wig to a canvas block head. You need the lace to be taut—but not stretched—so you can see the exact shape of the tear.
2. The Invisible Stitch
For a straight tear, you can use a "ventilating thread" or a very fine, clear nylon thread. Using a tiny sewing needle, perform a zig-zag stitch across the rip. The goal is to pull the edges together without creating a "seam" that will sit uncomfortably against your forehead.
3. Patching a Hole
If a piece of the lace is actually missing, you'll need a "donor" piece. This is why you should always save the excess lace you trim off new hd closure wigs. Cut a patch slightly larger than the hole, place it underneath, and whip-stitch the edges. It sounds tedious, but once the hair is styled over it, the repair becomes invisible.
How to Fix Balding (Re-Ventilating)
Balding happens when the knots slip off the lace. To fix this, you’ll need a ventilating needle (a tiny hook) and some bulk hair that matches your wig’s texture.
- The Technique: You essentially "re-knit" the hair into the lace. Take 2–3 strands of hair, loop them around the ventilating needle, hook it through a hole in the lace, and pull the hair through to create a new knot.
- Density Control: The biggest mistake people make is adding too much hair. Look at the surrounding lace closures density. If you make the repaired spot too thick, it will look like a patch rather than a natural part.
- Sealing: Once you’ve filled the spot, apply a tiny amount of knot sealer to the underside to ensure your new handiwork stays put.
The Reality Check: Pros and Cons of Repairing
Is every wig worth saving? Not necessarily. Here is the honest breakdown:
The Good:
- Saves Money: A $20 repair kit is cheaper than a $200 closure.
- Customization: You can fix a "middle part" and turn it into a "side part" by adding hair where you need it.
- Sustainability: It’s better for the environment to maintain what you have.
The Bad:
- The Learning Curve: Your first few knots might look a bit "clumpy." It takes practice to get the tension right.
- Time: Re-ventilating a large balding area can take an entire afternoon.
- HD Fragility: Because hd closure wigs use such thin lace, they are much harder to repair than standard Swiss lace. One wrong move with a needle can make the hole bigger.
FAQ: Keeping Your Closure Fresh
Can I use hair glue to fix a tear?
No. Glue is a temporary fix that usually ends up attracting dirt and making the lace stiff. It eventually cracks and can cause even more tearing.
How do I stop my HD closure wigs from balding so fast?
Always use a wide-tooth comb and start from the ends of the hair, working your way up. Never apply conditioner directly to the lace, as the oils can lubricate the knots and cause them to slide right out.
Is it better to just buy a new closure?
If the lace is "shedding" because it is old and the mesh is disintegrating, it’s time for a new one. If the lace is still strong but just needs a little "refill" of hair, repair is the way to go.

Summary
At the end of the day, lace closure wigs are an investment in your confidence and style. Learning to handle minor repairs like balding or small tears doesn't just save you money—it makes you an expert on your own hair. Next time you see a thinning patch on your lace closures, don't stress. Grab your ventilating needle, find a quiet corner, and give your favorite unit the TLC it deserves.